Showing posts with label Operating System. Show all posts

Repair Windows with the Recovery Console

11 komentar

Actually I wanted to post about the Windows XP Recovery Console, I wanted to write from scratch on how to use the Windows Recovery Console with the explanation a few pictures, but because my internet connection is slow because there is trouble then upload the picture will take a very long time, so I just will write about the core functions of the Windows XP Recovery Console in particular to repair damage to the computer.

1. Fix a corrupt Boot.ini
At the Windows XP startup, the program Ntldr Boot.ini file to determine where the files
OS reside and which options should be taken. So if the Boot.ini file of Windows XP then the problem will not be able to boot properly. If you suspect that Windows XP will not boot because Boot.ini has been corrupted, you can use a special Recovery Console version of the tool Bootcfg.

From the Recovery Console command prompt type:
Bootcfg / parameters
Replace / parameter with one of the following parameters:


* / Add - Scans the disk for all Windows installations and allows you to add a new Boot.ini file
* / Scan - Scans the disk for all Windows installations
* / List - Lists each entry in the Boot.ini file
* / Rebuild - Completely re-creates the Boot.ini file in total where the user must confirm each
* Steps.
* / Redirect - Allows the boot to a specific port when using features Headless Administration.Redirect parameter takes two parameters, [Port Baudrate] | [UseBiosSettings].
* / Disableredirect - Off the diversion.

2. Fix the Partition Boot Sector Damaged
Partition boot sector is a small part of the hard disk partition that contains information about the OS file system
(NTFS or FAT32), a machine language program that is crucial to help run the OS. If you suspect that Windows XP will not boot because the partition boot sector
damaged.
To use the tool Fixboot, the Recovery Console command prompt type:
Fixboot [drive]:

Where [drive] is the letter of the drive that you want to write its partition boot sector.

3. Fix a corrupt master boot record
Master boot record is responsible for starting the Windows boot procedure, in which there is the master boot code that is used to search for active or bootable partition on the partition table. If the master boot record is corrupt, the partition boot sector will not work and Windows will not boot. If you suspect that Windows XP will not boot because the master boot record is corrupted, you can use a tool called Recovery Console Fixmbr.

To use the tool Fixmbr, the Recovery Console command prompt type:
Fixmbr [device_name]

Where [device_name] is the device pathname for the drive that you want to write her master boot record.
Example device pathname for the drive C is:\Device\HardDisk0

4. NTOSKRNL Missing or Corrupt

If the computer can not boot by displaying the message "Missing or Corrupt NTOSKRNL", then upon entering the Recovery Console command prompt, do the following:

* Change to the CD-ROM drive Windows XP is located. Example: C:\> D: press enter
* Type: CD i386 press enter
* Type: expand ntkrnlmp.ex_ C:\Windows\System32\Ntoskrnl.exe press enter
* After the process completes type: EXIT to exit.

5. HAL.DLL Missing or Corrupt
If the computer can not boot by displaying the message "Missing or Corrupt HAL.DLL", then upon entering the Recovery Console command prompt, do the following:

* Type: bootcfg / list to display the contents of the BOOT.INI file
* Type: bootcfg / rebuild to repair.
* After the process completes type: EXIT to exit.

6. Corrupted or Missing \ WINDOWS \ SYSTEM32 \ CONFIG
If the computer can not boot by displaying the message "Windows Could not Start Because the Following files is missing or corrupt \ WINDOWS \ SYSTEM32 \ CONFIG \ SYSTEM or \ WINDOWS \ SYSTEM32 \ CONFIG \ SOFTWARE", then upon entering the Recovery Console command prompt, do following steps:

* Type: cd \ windows \ system32 \ config
* Next depends on the location of the damage:
* Type: ren software software.damage OR ren system system.damage
Next * again also depends on the location of the damage:
* Type: copy \ windows \ repair \ system
* Type: copy \ windows \ repair \ software
* After the process completes type: EXIT to exit.

7. NTLDR or NTDETECT.COM Not Found

If the computer can not boot by displaying the message "NTLDR or NTDETECT.COM Not Found", then upon entering the Recovery Console command prompt, do the following:

A. For the type of FAT partition

* Please you to boot from your Win98 floppy and copy the files NTLDR or NTDETECT.COM from the i386 directory to the drive stem (root) C: \ b.

B. For the type of NTFS partition

* Type: COPY X:\i386\NTLDR C\:
* Type: COPY X:\i386\NTDETECT.COM C:\
where X: is the address of the CD ROM drive, so adjust ..
* After the process completes type: EXIT to exit.

So how to repair Windows with the Recovery Console which I noted from various sources, some I have tried and succeeded. If these methods do not succeed then we can try to repair your Windows XP installation as a whole or forced to reformat and do fresh install of Windows XP.
Good luck


Read More …

How to easily create a partition in Windows 7?

21 komentar

Last night my friend asked for help to create a partition on new laptop, I also had to laugh turns 320 GB hard drive only made one partition C only. Now I will try to share how to create a partition in Windows 7
Creating Partitions in Windows on Microsoft's previous operating system such as Windows actually can also easily create partitions, but can not directly when the windows operating system is running, unless the use of certain auxiliary software. Excess in Windows 7 is able to directly create partitions on windows without the help of other software. When Windows 7 diistall for the first time usually use only one partition is drive C: as partitions. Partition is what will we divide in this tutorial. Distribution of this partition is known as shrinking the System Partition.
Note: Although this article specifically discusses the dividing partition system, the procedure described here can be used to shrink the partition ANY, not just the system partition. Also note that the partition dividing the system does not require a reboot and does not eliminate any files on shared drives.

 
Here are the steps :

1. Please you log on as Administrator.
2. Go to [Control Panel> System and Maintenance> Administrative Tools> Computer Management]. Another way is to right click on Computer icon on the desktop and select [Computer Management]. If you are prompted to enter an administrator password or confirmation, type the password or provide confirmation.

Click the arrow on the [Storage] and will open the Disk Management console.
4. Select your hard disk partitions that will be shared, such as in this example Drive C.
5. Right-click the disk you want to share and select [Shrink Volume].
6. The process will take some time, until the system shows the structure of the partition.


7. In the next window by default the system will automatically divide the size of each partition of old and new. You can change the size of the partition. Please note, once again, that this measure relates to the actual amount of free space on the partition to be shared. You can not take the space exceeds the amount of fragmentation of files on that partition. When finished, click the button [Shrink].

8. This process will be completed quite quickly, and reboot not needed. You can see the new partition size. The process is complete.
Good luck, Hopefully helpful


Read More …

A collection of Linux commands list

0 komentar

It seems that free things are more enjoyable, it can be seen from several open source software.
This also happens on Linux-based operating system, considering that this operating system for free so many people who like the existence of Linux, in addition to the security level of Linux is more secure / safe for use in an Internet network, the linux port is always closed and will open if the user / admin accidentally opened it, it will be difficult for hackers to penetrate the virtual world based linux port.
But the difficulty now experienced by the novice users will penggguna troubled by various kinds of commands in linux are a bit strange compared to the command prompt, but I'll give a little information about a variety of basic commands in linux, which will be describe below :

Collection & List Commands Linux + From the brief description A - Y:

a
adduser = Add users to the system
addgroup = Add group to the system
Create an alias = alias
apropos = Search Help manual pages (man-k)
apt-get = Find and install software packages (Debian)
aspell = Spellchecker
awk = Find and Replace text, database sort / validate / index
b
basename = Strip directory and suffix from filenames
= bash GNU Bourne-Again Shell
bc = Arbitrary precision calculator language
bg = Send to a background
break = Exit from a loop
= builtin Run a shell builtin
bzip2 Compress or decompress a file = name (s)
c
cal = Display calendar
case = conditionally perform a command
cat = Displays the contents of the file
cd = Change Directory
cfdisk = partition table manipulator for Linux
= chgrp Change group ownership
chmod = Change access permission
= chown Change file owner and group
chroot = Run command with a different root directory
chkconfig = System services (runlevel)
= cksum Print CRC checksum and byte count
clear = Clear terminal screen
cmp = Compare two files
comm = Compare two sorted files line by line
command = Run command - ignoring shell functions
continue = Resume the next iteration of a loop
cp = Copy one or more files to another location
= cron Daemon to execute commands that are scheduled
= crontab Schedule a command to run at another time
csplit = Split files into context - piece set
cut = split files into several parts
d
date = Display or change the date & time
dc = Desk Calculator
dd = Convert and copy files, write disk headers, boot records
ddrescue = Tools to improve data
DECLARE = Declare variables and give them attributes
df = Display disk space
diff = Show the difference between two files
= diff3 Show differences among three files
dig = DNS lookup
dir = Short List directory contents
dircolors = Color setup for `ls'
dirname = Convert all pathname to multiple paths
dirs = Display list of remembered directories
dmesg = Prints the messages the kernel & drivers
du = Estimate file space usage
e
echo = Display message on screen
egrep = Search files for lines that match an extended expression
= eject Eject removable media
enable = Enable and disable builtin shell commands
env = Environment variables
= ethtool Ethernet card settings
eval = Evaluate several commands / arguments
exec = Run command
exit = Exit from shell
Expect = automate applications that are accessible through the terminal free
expand = Convert tabs to spaces
export = Set environment variables
Evaluate the expression expr =


f
false = not doing anything, do not succeed
fdformat = low level format a floppy disk
= fdisk partition table manipulator for Linux
fg = Send job to foreground
fgrep = Search files for lines that match a fixed string
file = Determine the type of file
find = Find files that meet the desired criteria
fmt = Reformat text type
fold = Wrap text to fit a certain width.
for = Expanding the words, and run the command
format = Format disks or tapes
free = Display memory usage
fsck = Checking and repairing file system consistency
ftp = File Transfer Protocol
function = Define a macro function
fuser = Identification / decision process that is accessing files
g
gawk = Find and Replace text in files
getopts = Describe the parameters according to position
grep = Search files for lines that match a certain pattern
group = Print the name of the user group
Compress or decompress gzip = file name
h
hash = Given the pathname of a name argument
head = Output the first part of the file
help = Display help for built-in command
history = Command history
hostname = Print or set system name

i
id = id Print user and group
if = perform commands conditionally
ifconfig = Configuring network interfaces
ifdown = Stop the network interface
ifup = Starting or more network interfaces
import = Capture an X server screen and save an image to a file

install = Copy files and set attributes
j
join = join line in common field
k
kill = Terminate running processes
killall = Terminate process by name
l
less = Display output one screen at a time
let = Perform arithmetic on shell variables
ln = Creating links between files
= Creating local variables
locate = Find file
LOGNAME The bare = Print login name
logout = Exit a login shell
look = Display lines beginning with a certain string
LPC = line printer control program
= lpr Off line print
lprint = Print File / Print files
lprintd = Abort a print job
lprintq = List the print queue
= lprm Remove jobs from the print queue
ls = List information about file
= lsof List open files
m
Rebuilding the make = A group of programs
man = Help Manual
mkdir = Make a new folder
= mkfifo Make FIFOs (named pipes)
mkisofs = Create ISO9660/JOLIET/HFS hybrid filesystem
mknod = Make block or character special file
more = Display output one screen at a time
mount = Mount file system
= mtools Manipulate MS-DOS file
mv = Move or rename a file or directory
MMV = Move the masses and changed the name (file)
n
netstat = Information Network
nice = Set priority command or job
nl = number lines and write files
nohup = Run command immune to hangups
= nslookup Query Internet calls are interactive server
o
open = open file in default application
op = Operator Access
p
passwd Modify a user password
Combining rows = paste files
pathchk = Check file name portability
ping = Test network connection
pkill = terminate running processes
= popd Restore the previous value of the current directory
pr = Prepare files for printing / print
= printcap printer capability database
= printenv Print environment variables
printf = Format and print data
ps = Status Process
= pushd Save and then change the current directory
pwd = print working directory
q
= repulse the use of disk quotas and limit
quotacheck = Examine file system for disk usage
quotactl = Set disk quotas
r
= ram ram disk device
rcp = Copy files between two machines
read = Read a line from standard input
readarray = Read from stdin into an array variable
readonly = Mark variables / functions as readonly
Reboot the system reboot =
rename = Rename files
renice = Change priority of running processes
remsync = Synchronize remote files via email
return = Exit a shell function
rev = Reversing the line from a file
rm = Deleting files
rmdir = Remove folder
= rsync Remote file copy (Synchronize file trees)
s
screen = Multiplex terminal, run remote shells via ssh
scp = secure copy (remote file copy)
sdiff = Merge two files interactively
sed = Stream Editor
select = Accept keyboard input
= seq Print numeric sequences
set = Manipulate shell variables and functions
sftp = Secure File Transfer Program
shift = shift positional parameters
shopt = shell options
shutdown = Shutdown or restart linux
sleep = delay / delay for a certain period
slocate = Find file
sort = Sort text files
source = Run command from the file `."
Split = Split files into fixed-cut
= ssh Secure Shell client (remote login program)
= strace Trace system calls and signals
su = substitute user identity
sudo = Run command as another user
sum = Print a checksum for a file
symlink = Make a new name for the file
sync = Synchronize data on disk with memory
t
tail = Output the last part of files
tar = Tape Archiver
tee = Redirect output to multiple files
test = Evaluate conditional expression
time = time Measure Program running
Times = User and system time
touch = Change file timestamps
top = List processes running on the system
= traceroute Trace Route to Host
trap = Run command when a signal is set (bourne)
= tr Translate, squeeze, and / or delete characters
true = Do nothing, successfully
tsort = Topology sort
= tty Print filename of terminal on stdin
type = explain command
u
ulimit Limit user resources = (resources)
umask = The user creates a hidden file
umount = Unmount (not mounted) devices
unalias = Remove alias
uname = print system information
unexpand = Convert spaces to tabs
Uniq = Uniquify file
unit = Convert units from one scale to another
unset = Remove variable or function names
unshar = Unpack shell archive records
Until = Execute commands (until error)
useradd = Create a new user account
= usermod Modify user account
users = list of users currently logged in
= uuencode Encode a binary file
= uudecode Decode a file created by uuencode
v
v = Verbosely directory contents (`ls-l-b ')
vdir Verbosely = List directory contents (`ls-lb ')
vi = Text Editor
= vmstat virtual memory statistics report
w
watch = Execute / display a program periodically
= wc Print byte, word, and line count
whereis = Search user $ path, man pages and source files for the program
the which = Search user $ path for program files
while = Run
WHO = Print all usernames currently logged in
whoami = Print the current user id and name (`id-un ')
wget = Retrieve web pages or files via HTTP, HTTPS or FTP
write = Send a message to other users
x
xargs = Execute utility, passing constructed argument list

y
= yes Print a string until the interrupt

. = Script to run a command shell that is now
Good try new things from Linux
Read More …

How to Speed up Computer Performance

0 komentar

If at any time you feel that your computer was getting slow performance, there are some things that cause it to happen, ranging from temporary files or junk files, or because of a virus or it could also decrease the performance of your computer hardware.
Most of the problems experienced by computer users is slow because of the mess caused by the registry, corrupt and junk files that accumulate.
Here I will provide a way out pretty good and of course Free.
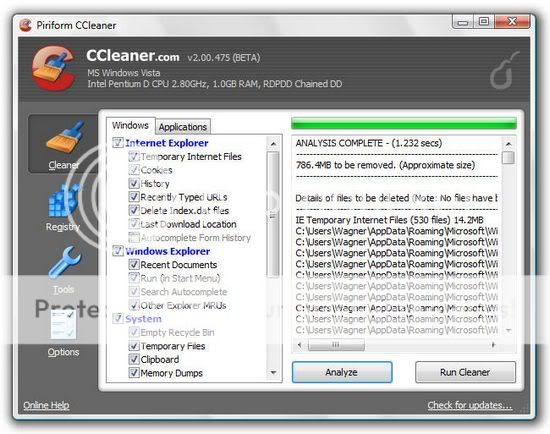
I always use CCleaner software, free software is very good but is able to clean the registry and make our computer's performance to be better
This software works by restructuring the registry, remove junk files and enhance the performance of our computers, even Hiren's boot CD also includes this software into a collection of software packages as an explanation of Piriform as the vendor of this software
CCleaner is our system optimization, privacy and cleaning tool. It removes unused files from your system - allowing Windows to run faster and freeing up hard disk space Valuable. Also it cleans traces of your online activities Such as your Internet history. Additionally it contains a fully featured registry cleaner. But the best part Is That it's fast (normally taking less than a second to run) and contains NO Spyware or Adware!
Cleans the Following:

Internet Explorer
Temporary files, history, cookies, Autocomplete form history, index.dat.
Firefox
Temporary files, history, cookies, download history, form history.
Google Chrome
Temporary files, history, cookies, download history, form history.
Opera
Temporary files, history, cookies.

Safari
Temporary files, history, cookies, form history.

Windows
Recycle Bin, Recent Documents, Temporary files and Log files.
Registry Cleaner
Advanced features to remove unused and old entries, Including File Extensions, ActiveX Controls, ClassIDs, ProgIDs, Uninstallers, Shared DLLs, Fonts, Help Files, Application Paths, Icons, Invalid Shortcuts and more ... Also comes with a comprehensive backup feature.

Third-party applications
Removes temp files and recent file lists (MRUs) from many apps Including Media Player, eMule, Google Toolbar, Netscape, Microsoft Office, Nero, Adobe Acrobat, WinRAR, WinAce, WinZip and many more ...

100% Spyware FREE
This software does NOT contain any Spyware, Adware or Viruses.

I think you need to try this software,
you can download this software at :
Download CCleaner
 
Read More …

System Recovery with Comodo Time Machine

0 komentar

Some time ago someone asked me about a system recovery and security using Comodo Time Machine.
This makes an inspiration for me to write a discussion that contains detailed information on Comodo Time Machine.
Comodo Basically Time Machine is not much different from the workstation, that is to return all the changes that occur on a computer system to a previous time, or to the default setting.
Here's an explanation straight from the official site www.comodo.com

Why use Comodo Time Machine (CTM)?


Comodo Time Machine (CTM) is a powerful system rollback utility that allows users to quickly restore their computers to an earlier point in time. CTM 'snapshots' are a complete record of your entire system (including the registry, critical operating system files and user created documents).

Layered Security
* Schedule automatic snapshots to be taken at regular intervals
* Roll back to the last known working state in the event of virus attacks or crashes
* Take snapshots of your computer before large installations or system maintenance

Software Developers and testers can easily restore test systems to the default configuration after each deployment without the need to manually uninstall each application. Home users can even let the kids run amok on the family PC for an afternoon and be safe in the knowledge that any damage can be instantly undone and all files recovered.

Comodo Time Machine features an intuitive, friendly interface which offers quick and easy access to all functionality in the application. Additionally, it also features a sub-console that can be accessed before Windows starts and a Quick Operation console containing shortcuts to important and commonly executed tasks.

Here are some features of Comodo Time Machine :
* Easy to use - even beginners can quickly create system snapshots with a few mouse clicks
* Provides instant and comprehensive system recovery after virus or spyware infections
* Instantly reclaim your machine after devastating system crashes
* Rollback the changes to ALL your documents - not just changes to system files and the registry
* Boot-up console allows you to rollback even when your system will not boot to Windows
* Test new software and network configurations in the knowledge that you can quickly switch back if problems develop
* Completely remove unwanted software installations without the need to uninstall or clean the registry
* Flexible restore options allow you to mount and browse snapshots to recover individual files or folders
* Right click on any file or folder to synchronize it with a snapshot version
* Schedule regular system snapshots to ensure highly relevant restore points
* Network administrators have another way to quickly fix user or software problems
* Libraries, Internet cafes and other publicly shared networks can schedule a total system restore at the end of each session

You can get this software free on the official site www.comodo.com

Download Comodo Time Machine
Read More …

Causes of a slow computer performance

2 komentar

Almost every computer will experience a decline in performance from wajtu to time, it was because of some things that can make the system crash or the system experienced heavy performance that we do not really need.
Here I will try to explain what things are slowing down our computer's performance in terms of the Software or system.

Adware
This is a program that will display ads on the computer. It would be disturbing because adware generally will use the resources of the computer, as a result computer is running slow. There is also a type of adware that appear in pop-ups that can interfere when you're working.

Brute Force
An activity to break the password by combining numbers and letters in sequence. Very dangerous if with this technique, people who are not entitled to succeed to know your password and then misused. To overcome this problem, it's good password that is used not only consist of numbers and letters but also consists of symbols like $, #, &, and others.

DDoS
Is a continuation of a Distributed Denial of Service, where a server or computer is attacked with bombarded shipment data in a very large size of many computers simultaneously. As a result the computer is difficult to access or damage to hardware not being able to accommodate very large data items.

Exploit
That is an application that tries to find and attack the weaknesses of the system to gain access to or for the purpose of infecting the system or computer.

Fake Antivirus
The way it works is by making as if a computer virus and suggest to buy anti-virus to overcome the virus.

Hoax
That is plain hoax spread through email or website. The effect is a panic or a lot of readers who were deceived. Another result is burdensome because of the Internet network of hoax chain messages are delivered to another person.

Keylogger
It is one threat that is dangerous. Keylogger will record that entered through the keyboard input to be stored or sent to someone who normally used for purposes that are not good. This is in particular to watch out for when you enter the password in public places like cafes. Password that you entered via the keyboard can be known and may be used for purposes that are not good.
One way to avoid a keylogger is to use On Screen Keyboard now must enter the password. On Screen Keyboard can be run from the Windows programs that are on Programs | Accessories | Accessbility or by typing in "OSK" from Start | Run on Windows Operating System.

Malware
Usually found on the bootsector on the disk, then change the course of the first run. Systems that are usually affected first is the Operating System. Infections in Operating System makes it easier malware to spread themselves or spread the virus on storage media such as CD ROM or Flash Disk.

Phishing
Is a form of fraud on the internet by making someone would provide important information that is not entitled to know. For example, by creating a website similar to a bank website. A victim does not realize he had been deceived and then enter the password that setealh known by the manufacturer can be used to deplete savings victim.

Rootkit
That is a program that aims to hide other programs running. Usually used to spread malware, virus, or keylogger.

Spam
Mean an unexpected email. Usually an email advertisement or a teaser for a person visiting a particular website which is actually a phishing or to disseminate malware. Messages can be sent in large quantities, so spend time to remove them.

Spyware
Is a program that works to spy on users with the purpose of obtaining critical information such as credit card numbers, PINs or passwords that can harm the victim because the leaking of such information.

Trojan
Acting as if he dalah good program that can be used to help users work. But, actually in it there are functions that endanger the overall system or to steal confidential information. Trojans easily spread to other computers.

Worm
Is malware that can multiply and then sends copies itself over a network without having a specific activity performed by users. The worm can be dangerous because it can become an entry point for viruses, malware or other destructive programs.

So my explanation may be useful.
Read More …

What and how do I use Hiren's Boot CD 11.0?

91 komentar


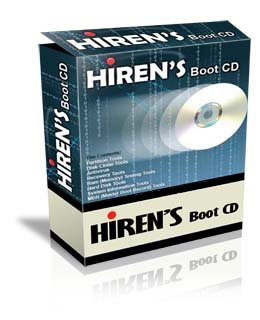
According to the previous post I promise that I will discuss the Hiren Boot CD 11.0, a package tool that must be owned by a computer technician, I've just used it to eradicate the virus sality which have damaged Windows, to not be able to boot again.
The following is an excerpt from http://www.hirensbootcd.net/ explanation:

Hiren's BootCD (HBCD) is a completely free bootable CD That contains a load of useful tools, you make use of cans in a variety of situations like analyzing, recovering and fixing your computer even if the primary operating system, cans not be booted.

It is a great resource for anyone with computer problems Who is having trouble accessing the internet to download programs in an attempt to fix it. It has a multitude of tools divided into a number of categories like partitioning tools, backup, recovery and BIOS / CMOS tools to Name A Few.

With Some simple knowledge about what is contained on the CD, you cans use it to repair many computer problems like hard drive failure, virus infections, partitioning, password recovery and data recovery.


May We call it as an emergency cd Technician or the which every user's home computer must have.

We thank and appreciate for his great Hiren BootCD. This site is just a download place for Hiren's BootCD and is not related with Hiren. For developer's homepage please visit Hiren's homepage under the links.


Partition Tools
If you need to make changes to the partitions on your computer, there are applications installments That Provides Various levels of functionality for accomplishing this goal. You can both create and delete partitions from your computer, even while there are other partitions on the hard drive you are modifying. Also You can resize partitions if needed, to change how much space is Allocated to them.


Backup and Recovery
There are installments backup and recovery tools on Hiren's BootCD. Backup tools like GetDataBack, HDD Scan, Partition Find and Mount, PhotoRec, Recuva, Undelete ... let you copy data off of your hard drive and schedule automatic backups to Ensure your data is saved to another location. Also You can recover deleted data, whether That data was deleted intentionally or accidentally. There Are Also A Few tools that will of help you recover data from Damaged or corrupted portions of your hard drive if you are Unable to recover Them through other methods.


Testing Tools

Hiren's BootCD Provides a variety of tools for testing different aspects of your computer. That if you suspect your RAM is corrupted or That a piece of hardware on your machine is not functioning properly, there are installments cans applications you run to determine the problems. Also You can perform a hard drive tests to see whether your hard drive is physically Damaged, and get a report on how much longer your hard drive is expected to work.

Password Tools
Password recovery and modification tools are Also provided on Hiren's BootCD. You can change the administrator password on Windows machines, and there are utilities for saving passwords for your online accounts in an encrypted format. Also You can encrypt your entire hard drive with Hiren's BootCD so That a password is required to read or write any data from or to your hard drive.


Mini Windows XP
To clear a virus and use a large collection of HBCD tools, choose the Mini Windows XP option. A simple version of Windows XP will of load on the computer. It Might take A Few minutes to load everything Because it processes files directly from the CD. Once it has loaded, wait for the Hiren's Boot disk menu to pop up. Select the "Menu" option and scroll through the programs. The disc features the Windows password hackers, registry cleaners and a large collection of antivirus software.

Hiren Boot CD 11.0 it contains almost all the major equipment that we need to repair the damage the software on our computers.

See the latest version of Hiren's BootCD Here

Download Hiren's Boot CD 11.0 here
Read More …

How to build a network on a Linux operating system?

2 komentar

The reader may already be accustomed to make a network on the Windows operating system, yet another case padaLinux, still many people who feel Linux is something that is hard, including me, but all that is just a mere suggestion and because we are afraid or unwilling to try, the following I will explain about how to build a network on a Linux operating system. There are several things that must be done before building such a network include:

1.
1. note card series from the vendor and the network card (NIC) that we have, the type and brand, its bus type (ISA or PCI), if the ISA also noted IRQ and I / O addresses.
2. check whether the kernel during the boot process is to recognize the network card or by using the command dmesg.

The reader may already be accustomed to make a network on the Windows operating system, yet another case padaLinux, still many people who feel Linux is something that is hard, including me, but all that is just a mere suggestion and because we are afraid or unwilling to try, the following I will explain about how to build a network on a Linux operating system. There are several things that must be done before building such a network include:


1. note card series from the vendor and the network card (NIC) that we have, the type and brand, its bus type (ISA or PCI), if the ISA also noted IRQ and I / O addresses.
2. check whether the kernel during the boot process is to recognize the network card or by using the command dmesg.

Every Linux distro has a program in their respective utilities, including utilities for configuring Linux into a network. On RedHat distribution we can we can do pensettingan network card through linuxconf.

Ip setting aims to demonstrate or provide id on our computers will be connected to the network. So good that our computer or other computers can communicate with each other. Must be remembered that in doing pensettingan we must enter as a user with high priority or administrator is often referred to as root "#". Sharing files on linux is aimed so that we can share files with other computers.

For our file sharing using samba. Samba is an

prangkat UNIX application that uses the SMB protocol (server message block). On linux with the latest version of samba is already available devices. But if no sorce we can download.Download samba [root @ proxy / home / install] $ wget. http://us3.samba.org/samba/ftp/samba-latest.tar.gz or search for it on samba.org mirrors.

Common commands used in Linux or UNIX, using ifconfig command. Ifconfig command is very commonly found in all Linux distributions and UNIX and is used to configure or check the configuration of network devices. Ifconfig can be used to determine the IP address (IP address) of a network card, netmask, and his broadcast address. Or replace some parameters TSB. ifconfig will be always be used as a command from the script file / etc / rc.d / rc.local on each interface that has been supported by the system.

1. Setting the IP Address, Netmask, and Broadcast

Syntax for setting these opinions are: ifconfig interface IP_Address netmask mask broadcast address. The command is used to determine the basic parameters on the network card, wherein:

a. interface - is a label identifying the network card is used. For example, etherner1 known as etho.

b. IPaddress - is the value to assign the IP address of network card

c. Netmask mask - used to determine subnetmask. This parameter can be omitted if the mask is passed will be set by default (meaning the network is not included in this subnet)

d. Broadcast address-an address from the broadcast on the network. The default host ID on all bits set to one. All the hosts in the same network must have the same broadcast address.

In the following example, use ifconfig to set IP address and netmask of an NE2000 Ethernet network card.

# Ifconfig eth0 192.168.0.12 netmask 255.255.255.0

Can also use the hostname of an IP address,

# Ifconfig eth0 netmask 255.255.255.0 broadcast 11c 192 168 255 255

2. Checking the configuration with ifconfig

To verify whether the configuration was embedded, use the command

# Ifconfig eth0.

In the ifconfig command, there are several optional parameters such as up and down where the parameters are used to activate (enable) or deactivate (disable) a network card. The parameters are used: # ifconfig eth0 down (to disable the network card). # Ifconfig eth0 up (to re-activate the network card). If we intend to change the identity of a network card (an IP address, netmask, and broadcast address), then we must disable the network card, then configure it again with a new identity and then we'll switch back and do not forget to check the configuration again, then use ping command.

Use the command ifconfig is only temporary, because if the computer rebooted, the configuration we have made previously inactive again. This is because the files TCP / IP startup tidakdiperintahkan to activate these configurations.

Working steps

IP settings on linux (ubuntu)

A. Changing the configuration script memekai

1. jarkom login: jarkom

2. password: jarkom

3. jarkom @ labjar $ su (root)

4. root @ labjar #

5. # ifconfig root @ labjar

6. root @ labjar # pico / etc/rc.d/rc.inet1.conf

# Information for eth0

7. # Config information for eth0:

IPADDR [1] = "192 168 100 104"

8. netmask = "255.255.255.0"

9 The gateway = "192.168.100.1"

10 ifconfig eth0 root @ labjar

11 root @ labjr # / etc/rd/rc.inet1 restart apply konf.

Root @ 12 # ping ip own labjar

root @ labjar # ping 19,168,100,104 repply

Root @ 13 # ping ip next labjar

root @ labjar # ping repply 192 168 100 103

B. wear display

1. root @ labjar netconfig # check config

2. hostname: optional computer name

3. domain: root

Select a static ip

4. Ip address: "192.168.100.14"

5. Netmask: 255.255.255.0

6. Gate Way: 192.168.100.1

7. Mipa.uns.ac.id: 222 124 162 145

Man net config

Man if config

Analysis

1. While filling the login, maybe there are some PCs that do not successfully login if filled with a login that has been determined. For that filled the root login.

2. # Pico / etc/rc.d/rc.inet1.conf used to manually edit the IP

3. Ifconfig if the windows is the ipconfig. Useful to check the ethernet already installed or not. Also ifconfig also to see the IP address.

4. / Etc/rc.d/rc.inet1.restart used to restart. This command is used when we change the IP. After the IP we save and we check, it turns out the IP still has not changed, then we use this command to restart the IP which we have previously saved.

Conclusion

1.
1. To find the IP configuration has been replaced in Linux, use the command: cd/etc/rc/d-inet1.restart.
2. On Linux to do the setup of TCP / IP using a script (.... / Etc / ....)
3. On Linux IP configuration update / disave first and can be run.
4. To check whether the computer network we are able to function properly, use the command "ping [computer's IP configuration]" for example: ping 192 168 100 104
5. To mengetahiu indication / IP configuration details on our computer, use the command: "ifconfig".


Read More …

How do I install windows with a USB flash?

1 komentar

This morning around 5 am when I was falling asleep suddenly there was an SMS from a friend who asked how to install Windows from USB.It makes me inspired to write on this blog

Installing windows xp from flash disk is also very useful to install windows xp in a few notebooks that are not equipped with serial cd-rom as a kind of mini notebook Asus Eee pc. It can be installed using an external cd-rom, but for more savings we can try to install windows using only flash disk


With technological development flash disk now that have greater capacity then we can easily use a flash disk to install windows, the following should be prepared syarat2.

1. Flash disk (if you can at least 1GB).

2. victim's computer (victim)

3. master computer, complete with cd-rom of course (to create a master flash disk)

3. windows xp cd (original or fake is up)

4. program for module installation

- USB_PREP8 (download via indowebster)


- PEtoUSB (download via indowebster)

after never knacks above is ready then the next step to start installing windows xp from flash disk:

the steps are as follows:


1. Plug the flash disk to your computer and note the position of the master drive, whether on the F:, G:, H:, O: and so forth

2. file2 the above extract, USB_PREP8 and PEtoUSB into a folder eg C: / usb (extract the files USB_PREP8 be a folder, copy all the files and move them to the folder C: / usb) files as well PEtoUSB.


3. Prepare instalan cd windows xp cd rom and put it into a master computer.

4. then open the folder C: \ USB that has been created and contains the files mentioned above.

5. Next run the file named "usb_prep8.bat" and will display a command prompt window contains a variety of command

press any key on the keyboard.

6. next on your computer screen will appear PEtoUSB program that asks you to format the flash disk, click Start

7. If the formatting process is complete, close the program PEtoUSB (do not close the windows command prompt usb_prep8.bat) on the screen will display the options of 0 to 5.

8. Then select the option to 1 to select the Windows installation source files (select the cd rom drive that contains your Windows installation cd) or can also file2 source folder containing the installation of windows.

9. after the above, will be asked to again choose the options and select option number 3 to mentukan where you plug the flash disk you, when in drive E then type e and press enter.

10. after this stage select option 4 to start the installation process modules that will be copied to flash disk automatically. Answer any confirmation that comes with Y, or YES or OK or other forms of approval. in this process will take quite a long time, the process of making the module installation file to your flash disk (probably more than 15 minutes)
aja patient, after you've finished now has a flash disk that is bootable and able to install windows directly.

11. unplug the flash disk from the master computer and then plug it into your computer to start the installation, do you boot your computer from the flash disk.

then the screen will show two installation options, choose the second option and the windows installation process will start running.
Thus my explanation may be useful, happy trying new things.


Read More …

How to speed up computer performance with a defrag?

2 komentar

Often we see slow computer problems, it could be caused by several things, one of the messy file.
to overcome this one is to defrag.
Formatting the hard disk is a temporary solution. Plus the way it requires us to do various other things such as backing up data, reinstalling all the programs, setting up the windows, and restore the data. Even after this, if you do not spend time for maintenance, hard disk, the problem will come back again a few months after formatting the hard disk.

Cleaning and Men-Hard Disk Defrag

Defrag (defragmentation / unify piece): cause the only one who makes the hard diskmu slow is the high separation of data files and the number of groupings. In short, the way hard drives work is that when you install a program, then the windows to place the data on your hard drive in the segment nearest the existing data, if the segment is full, then the data will be stored in the next segment. Windows puts a kind of marker from one segment to another segment to process a file, and this process will continue until the windows reach the EOF (End Of File).
It is highly recommended to do defrag your hard disk so that the segments of data that can be moved separately its position so close, if not possible to be combined.

Windows does provide a feature to defrag the hard drive, but the process requires resources / sources that are substantially during the defrag your hard disk. My advice, do not use that feature. Besides that, I suggest you to download Smart Defrag (1.66 MB) for free.

This program is rich in features, including automatic defrag. By default, automatic defrag in the ON condition - he did defragment if the system in a state of unemployed for five minutes, but you can change according to your wishes. When finished setting up the Smart Defrag, you can forget to defrag your hard drive, because he walked with windows and works invisible to monitor and defrag your hard drive.

Tip: When talking about defragment the hard drive, I recommend another program in addition to dealing with Smart Defrag Pagefile. Pagefile fragmentation can cause a long boot process. Page Defrag (68 KB) defragmented the pagefile when booting so that the segments remain adjacent pagefile.

Clean your computer

Another factor that can cause a slow hard drive performance is, temporary files (temporary files), the legacy after the uninstall, cookies, logs, and many of the files that are not useful to take place in harddiskmu - which culminate in the fragmentation of files. It is important for you to delete those files. Windows already provides a feature (very limited) for it. You can try the Disk Clean-up Wizard in Accessories submenu in All Programs.

To clean up completely, I recommend Comodo System Cleaner (CSC), which can dodownload free. This program can be defragmented the registry, could accelerate the opening of a program by deleting all files and settings that are not needed privacy. CSC also has a feature to clean up our computers on schedule (scheduled cleaning).

In conclusion, the cleaning of the computer system is scheduled by CSC and auto-defrag from Smart Defrag will improve performance and speed of hard diskmu, so you seemed to have a new hard disk. With these programs you will not feel your hard disk to work slowly.
so hopefully useful. good luck
Read More …

What is the use partition and how do they make?

0 komentar

What is the use partition and how to make it, maybe some people still lay with it, here I will try to give a little explanation about the meaning of partition and how to make it.
Partitioning means dividing the hard disk memory space on your hard drive. Each hard drive must be partitioned at least once, and adapt to the operating system that will be used .. A computer that is installing more than one operaai systems usually have multiple partitions. The advantage of more than one partition, among others, can minimize the clutter in the operating system, data can be made safer, the efficient use of space hasrddisk, makes backing up data and searching files.

In a hard disk has several types of partitions, namely:
1. Primary Partition
Primary partition is a primary partition on the hard disk that contains some data files. The function of this primary partition as the partition of the first accessed the computer to boot.

2. Extended Partition
The extended partition is also a primary partition on the hard disk. The extended partition function to overcome the limitations of the division of the partition. The extended partition does not handle the processing of data directly. To be able to use it we must create logical partitions first.

3. Logical Partitions
A logical partition is a partition side there extended partition. A logical partition is able to accommodate a variety of data files.

Before we partition the hard drive then we must consider first:
Type of partition that we will use:
Adjust partitions with operating systems that will be executed, because the operating system should be run in accordance with the environment itself, eg:
Windows 95 = FAT 16
Windowa 97 & 98 or 98SE = FAT16 & FAT32
Windows 2000 & XP = FAT32 & NTFS5
Linux = Ext2 or Ext3
Large capacity hard disk partition must be eligible species, for example:
FAT16 = maximum 2 GB hard drive
FAT32 = the entire hard drive 850 MB to the top.
NTFS = maximum of one terabyte hard drive on top

Software-software that can be used to partition the hard drive is as follows:

a. FDISK

This application is already available within the system booting Microsoft Windows, but in accordance with their respective operating systems bootingnya.
Using FDISK advantages:

Available free of charge on CD Master windows or created in the system boot diskette so concerned.

Using FDISK Disadvantages:
We can only create partitions as type so concerned.
When we create two partitions on one disk, then the result is a primary partition, a logical partition.

Practical demonstration:

Enter into floppydisk diskette or boot cd to the CDROM.
Change the system BIOS to boot first into floppydisk or CD-ROM (depending on us to use boot diskette or CD):
External Cache: Enabled
Quick Power On Self Test: Enabled
Boot Sequence: A, C, SCSI  Change to the CDROM / floppydisk
Swa [floppy drive: the Disable
Boot Up Floppy Seek: Enabled
After booting, select the menu that supports a CDROM or directly enter:

After entering the system, dos, then type FDISK and press enter:

Select (Y) for FAT32 and (N) for FAT16:

Choose no (1) Create DOS partitionà ¢ â, ¬  | .. to create a new partition, kamudian press enter:

Then select no (1) Create a Primary SINS ¢ â, ¬ Â | .. to create a primary partition (primary):

After that plih O (Y) to create a partition, or select no select (N) whenever you want to create another partition. If select (Y) then finished, press ESC to exit the disk and do the selanjutna.

After creating the partition is complete, restart your computer.

After re-entry into the dos system, do format your hard disk by typing the drive that followed the format will be formatted:

Once completed, restart again.
Hard drive ready to be installed Operating System.

b. RANISH PARTITION MANAGER.

Special applications of artificial Ranish partition.
The advantage of using ranish partition manager:
- Easily used
- Able to create different partition types (FAT16, FAT32, NTFS, BeOS, Linux, etc.).
- Able to make 2 pieces (more) primary partition.
- Can make more than two partitions on one hard drive.

Practical demonstration:

Enter into floppydisk diskette or boot cd to the CDROM.
Change the system BIOS to boot first into floppydisk or CD-ROM (depending on us to use boot diskette or CD):
External Cache: Enabled
Quick Power On Self Test: Enabled
Boot Sequence: A, C, SCSI  Change to CDROM / floppydisk
Swa [floppy Drive: Disable
Boot Up Floppy Seek: Enabled

After booting, select the menu that supports CDROM or directly enter:

Once in the system, dos, moved into the CDROM drive and then go into the folder where the Ranish Partition Manager is, Selah was part type and press enter.

Partition Manager Ranish menu:

To start creating a new partition, select the section which unesed written in the first place, then hit enter.
Then select the type that will be used, and determine how large the partition can be created (if you want to create two partitions), or directly press ENTER whenever you want to use the entire space to a partition:

Then select the save now to save the process that has been made earlier:

Then select the format now that the partition had been made directly formatted:

Then select the format to format the hard drive normally, or a quick format to format the drives quickly without checking whether the disk is still good or not:

Making do again when the last partition we create more than one partition:

Having already formed a new partition and formatted, it must enable one thought to be the system boot partition (usually the largest), if we do not enable the disk later when we install the operating system will not boot. Press the B button to activate the system boot partition (boot flag). Pay attention! Partitions that have been activated there is an arrow beside:

When finished, press ESC, then select Save MBR

After returning to DOS, restart your computer kembal.
Hard drive ready to install the Operating System.

c. POWERQUEST PARTITION MAGIC.

Special applications of artificial PowerQuest Partition.
The advantage of using Powerquest Partition Magic:
Can create various types of partitions.
Can make 2 pieces (more) primary partition.
Can make more than two partitions in one disk.

Lack of use Powerquest Partition Magiccyaitu:
Less well used for beginners.
Because it is run from windows, it can only damage we do not want partition.

Format Harddrive
Format hard drive is a way of giving the hard drive to hard drive system could be used seefesien possible by knowing beforehand what operating system will be used. Format hard drive made after we finished partitioning the hard disk.
Provided on the hard disk system we are familiar with the term FAT (File alocation Table), this is where the key of the whole management information on the hard disk or any other term File System. File system task to allocate space in the hard drive data information and to arrange the spaces are still empty. The file system is also responsible for caring for the names of files and directories as well as where the files are placed. file system consists of three essential parts, namely (1) boot record and operating systems, (2) directory and (3) files. Each system has a file system opersai different. Here are the types of file systems you need to know.

FAT 12
Fat FAT 12 is the first time used in the DOS on the IBM PC (1981). This uses the FAT file allocation table for 12 bits, so often referred to FAT 12. The maximum capacity of 12 is formatted by FAT Cluster 4086, so the FAT is suitable for small-capacity hard drive.

FAT 16
FAT 16 FAT 12 is a development of that used on the Windows 95 operating system's first version (1990). This uses the FAT file allocation table at 16 bits. The maximum unformatted capacity is 65 526 clusters. And typically handle 16 MB hard disk capacity, GB 2048.

FAT 32
FAT 32 appears because the FAT 12 and 16 no longer able to manage large-capacity hard drive. FAT supports windows operating system 95C and beyond. It uses 28-bit FAT cluster whereas four bits digumakan to backup / reserved.

NTFS (New Technology File System)
NTFS is generally used on the Windows NT operating system and its offspring. Compared with the FAT system, NTFS is much more effective and safe in the management of files, because files can dienskripsi NTFS.

HPFS (High Performance File System)
HPFS is used on OS / 2 (made by IBM). HPFS is able to read data faster than the FAT system.

VFAT
VFAT and FAT are different, the difference is the ability to support long file naming, improved operating system performance, and good data management capabilities.
To adjust the use of file system and operating system you can see in the following table:
File System Operating System
FAT 12 DOS versions 1.x and 2.x
FAT 12 and FAT 16 DOS version 3.x, 6.x and Windows 3.x
FAT 12, 16 and VFAT DOS version 7 and Windows 95A
FAT 12, 16, 32 VFAT DOS version 7.1 and Windows 95B / C
FAT 32 Windows 95B / C, Win98, ME, 2000 and XP
NTFS Windows NT, 2000, 2003, and XP
HPFS OS / 2, Windows NT version of the old
Ext2, ext3, Linux, Linux Swap
good luck and definitely do not ever scared of
Read More …