Showing posts with label Trick Windows. Show all posts

Lock Folder without tools and without encryption

37 komentar

Lock Folder without tools and without encryption.
Sometimes we have an important and confidential files, on the internet lots of tools to secure Folders from the reach of people who are not entitled to access them.
But this is of course by using a tool, here I will give you an easy way to secure the folder and its contents without using any tool.
How:
Right-click the folder and then rename it with the extension code:
. {2559a1f2-21d7-11d4-bdaf-00c04f60b9f0}


So eg Folder names must rename Budi then becomes:
Budi. {2559a1f2-21d7-11d4-bdaf-00c04f60b9f0}


If writing the code is correct then the Folders will turn into icons and Folder Lock can not be accessed.
So how do we access these folders?
We just need to rename the back, just add the extensions as you like, for example:
Budi. {2559a1f2-21d7-11d4-bdaf-00c04f60b9f0} rename to:
Budi. {2559a1f2-21d7-11d4-bdaf-00c04f60b9f0}. ABC
Then folders will function as before
Given that not all people understand the system and trick like this then I conclude that this method is still relatively safe
Good luck
If you like the article content of this blog, I beg to list this blog link on your site.
thank you
Read More …

Locking Computer with a USB flash

1 komentar

Actually had a very long time I wanted to write this, but time constraints forced the late publication of this article. Very Many ways to lock our computers out of the reach of people who are not entitled to know the contents of our computers, when I usually by a switch user.
But now I will share how to lock the computer with USB flasdisk. There is now software that can do that. The name of the software ID USB Lock Key.
This time I tried to explain how to use the ID USB Lock Key


1. Download ID USB Lock Key click here
2. Extract the file ID USB Lock Key download results with 7zip.
3. Enter FlashDisk which will serve as the key to your computer.
4. In the extract the folder, click 2 times the file "ID USB Lock Key".
5. Will display showing ID USB Lock Key with orange color.
6. To create a data lock on your flash drive, click on the "Generate Key".
7. Once successful, it will show a window with the message "The key generated sucesfully", then click OK.
8. To activate this ID USB Lock Key, click "Launch systray".
9. To lock your computer, Remove the Flash Disk in advance that you use as a lock.
10. Then in systry you (on your taskbar icon will appear USB port of ID USB Lock Key) Right click and Select Lock the Computer menu. (You can also do the lock by pressing Ctrl+Alt+L)
11. Furthermore, your computer screen will be blank and there is a warning "Please insert the USB drive containing your generated key ID USB LOCK KEY"
12. To unlock it, re-enter FlashDisk (which you use as a key)
Hopefully useful.

Read More …

Microsoft Word Shortcut Keys

0 komentar

A few days ago I wrote about Microsoft Excel Shortcut Keys, now I will explain about the Microsoft Word Shortcut Keys, even though I rarely use these Office applications. but there is no harm in me trying to share on this blog
The following are some shortcut keys in Microsoft Word:
ctrl + a -> select all
ctrl + b -> bold
ctrl + c -> copy
ctrl + d -> edit fonts
ctrl + e -> average middle


ctrl + f -> find
ctrl + g -> go to
ctrl + h -> replace
ctrl + i -> italic
ctrl + j -> the left-right
ctrl + k -> insert hyperlink
ctrl + l -> left flat
ctrl + m -> set left indent
ctrl + n -> create a new document
ctrl + o -> open an existing document
ctrl + p -> print
ctrl + q -> cleaning the paragraph formatting
ctrl + r -> right
ctrl + s -> save
ctrl + t -> set the hanging indent left
ctrl + u -> underline
ctrl + v -> paste
ctrl + w -> close window
ctrl + x -> cut
ctrl + y -> redo
ctrl + z -> Undo
ctrl +] -> enlarge font size
ctrl + [-> zoom font size
ctrl + = -> subscript
ctrl + + -> superscript
ctrl + scroll up -> Zoom In
ctrl + scroll down -> Zoom Out


[Home]
Go to the starting position of a row
[End]
Towards the end of a line position
[Alt] [Tab]
Opening another page that opens quickly
[Alt] [O] [P]
Opening paragraph dialog box
[Alt] [O] [F]
Opens the Font dialog box
[F7]
Opens the Spelling and Grammar dialog box to examine the sentence structure and spelling according to the dictionary that has been provided.
[Alt] [F] [C]
Closes the currently open document without getting out of Microsoft Word.

Hopefully Helpful

Read More …

What and how to work svchost.exe?

1 komentar

For Windows users must know svchost.exe. That program is definitely running and we can see in task manager. You can not stop the process, and you do not you will not know when the process begins ...
Now the question whether it is svchost.exe?

According to Microsoft: "svchost.exe is a generic host process name for services that run from dynamic-link library". whether you can interpret the system?
Some time ago, Microsoft started moving all the functionality from internal Windows dll file is not divided into exe files. From the programming perspective this makes more sense for reusability ... but the problem is that you can not launch filedll. directly from Windows, it must be entered and run with the executable (. exe). svchost.exe process that's beginning to form.
sometimes we are confused why many Svchost running on our computer


If you've seen parts of the Service in the Control panel you might notice that there are many services that are needed by Windows. If every single service beekerja under a single svchost.exe instance, a failure in one system may mengakibatksn all sytem Windows fails to work, so they separated.
Services are organized into logical groups, and then a single svchost.exe instance is created for each group. For instance, one svchost.exe instance run 3 Service relating to the firewall. Another example of svchost.exe can run all the service related to user interface, and so forth.

What should you do?
You can cut the services that are not required to disable or terminate the Service that does not absolutely have to run. Also, if you see a very heavy CPU usage on svchost.exe instance you can restart the service is running.
The biggest problem is to identify what service is running on a particular svchost.exe instance, we will discuss it below.

If you want to know what we are talking, open the Task Manager by way of Press Ctrl + Alt + Del simultaneously and then click the Process menu and check "Show processes from all users"

Checking From the Command Line (Vista or XP Pro)
If you want to see what services are to be hosted by a particular svchost.exe instance, you can use the tasklist command from the command prompt to see a list of services.
how to click Start => Run => cmd then type the command, after being in command at the dos prompt type CD\and then on the C prompt type tasklist /SVC (C:\tasklist/SVC)


The problem with using the command line method is that you do not need to know what the names are vaguely visible.

Checking in Task Manager in Windows Vista
To check the Task Manager of this facility can not be done on Windows XP, but you can use a utility called Process Explorer which will be discussed below. You can right click on a particular svchost.exe process, and then select "Go to Service".


This goes to the Services tab, where the service is running under the svchost.exe process will be selected. This way you can see the original name under the Description column, so you can choose to disable the service if you do not want to operate.

Using Process Explorer in Vista or XP

You can use the excellent utility just as Process Explorer from Microsoft / Sysinternals to see what services are running as part of a svchost.exe process.
Using your mouse over one of the process will display a popup list of all services:
Or you can double-click on the svchost.exe instance and select the Services tab, where you can choose to discontinue a service if you choose.
hopefully you are not confused with the existence of this svchost.exe

Read More …

Limiting computer copying files to USB Flasdisk

0 komentar

Several reasons for computer owners to restrict his computer so can not save data to USB flash disks, There are several tools scattered on the internet, but it certainly will add a burden to your computer's performance.
For that I am trying to provide another alternative to the registry settings, this applies to Windows XP, for Windows 7 I have not tried it
For security reasons, you can prevent the computer storing the data to a USB drive, how:
1. Click Start and select Run. Type "regedit" (without the quotes) and click OK.

2. Find address HKEY_LOCAL_MACHINE\SYSTEM\CurrentControlSet\Control.


3. In the right pane, right click and create new keys (New Key) with the name "StorageDevicePolicies".

4. In the left pane, select the newly created StorageDevicPolicies earlier. Create a new DWORD value and name it "WriteProtect".

5. Change the value to "1". Close the editor and restart the computer.

Note:

To restore its original pal only replace the Value Data from key "WriteProtect" to 0, to reactivate Block 1 USB input

you still can copy and paste files from a flash or other devices that use the media to your computer USB port, but not vice versa.
Hopefully helpful
Read More …

Repair Windows with the Recovery Console

11 komentar

Actually I wanted to post about the Windows XP Recovery Console, I wanted to write from scratch on how to use the Windows Recovery Console with the explanation a few pictures, but because my internet connection is slow because there is trouble then upload the picture will take a very long time, so I just will write about the core functions of the Windows XP Recovery Console in particular to repair damage to the computer.

1. Fix a corrupt Boot.ini
At the Windows XP startup, the program Ntldr Boot.ini file to determine where the files
OS reside and which options should be taken. So if the Boot.ini file of Windows XP then the problem will not be able to boot properly. If you suspect that Windows XP will not boot because Boot.ini has been corrupted, you can use a special Recovery Console version of the tool Bootcfg.

From the Recovery Console command prompt type:
Bootcfg / parameters
Replace / parameter with one of the following parameters:


* / Add - Scans the disk for all Windows installations and allows you to add a new Boot.ini file
* / Scan - Scans the disk for all Windows installations
* / List - Lists each entry in the Boot.ini file
* / Rebuild - Completely re-creates the Boot.ini file in total where the user must confirm each
* Steps.
* / Redirect - Allows the boot to a specific port when using features Headless Administration.Redirect parameter takes two parameters, [Port Baudrate] | [UseBiosSettings].
* / Disableredirect - Off the diversion.

2. Fix the Partition Boot Sector Damaged
Partition boot sector is a small part of the hard disk partition that contains information about the OS file system
(NTFS or FAT32), a machine language program that is crucial to help run the OS. If you suspect that Windows XP will not boot because the partition boot sector
damaged.
To use the tool Fixboot, the Recovery Console command prompt type:
Fixboot [drive]:

Where [drive] is the letter of the drive that you want to write its partition boot sector.

3. Fix a corrupt master boot record
Master boot record is responsible for starting the Windows boot procedure, in which there is the master boot code that is used to search for active or bootable partition on the partition table. If the master boot record is corrupt, the partition boot sector will not work and Windows will not boot. If you suspect that Windows XP will not boot because the master boot record is corrupted, you can use a tool called Recovery Console Fixmbr.

To use the tool Fixmbr, the Recovery Console command prompt type:
Fixmbr [device_name]

Where [device_name] is the device pathname for the drive that you want to write her master boot record.
Example device pathname for the drive C is:\Device\HardDisk0

4. NTOSKRNL Missing or Corrupt

If the computer can not boot by displaying the message "Missing or Corrupt NTOSKRNL", then upon entering the Recovery Console command prompt, do the following:

* Change to the CD-ROM drive Windows XP is located. Example: C:\> D: press enter
* Type: CD i386 press enter
* Type: expand ntkrnlmp.ex_ C:\Windows\System32\Ntoskrnl.exe press enter
* After the process completes type: EXIT to exit.

5. HAL.DLL Missing or Corrupt
If the computer can not boot by displaying the message "Missing or Corrupt HAL.DLL", then upon entering the Recovery Console command prompt, do the following:

* Type: bootcfg / list to display the contents of the BOOT.INI file
* Type: bootcfg / rebuild to repair.
* After the process completes type: EXIT to exit.

6. Corrupted or Missing \ WINDOWS \ SYSTEM32 \ CONFIG
If the computer can not boot by displaying the message "Windows Could not Start Because the Following files is missing or corrupt \ WINDOWS \ SYSTEM32 \ CONFIG \ SYSTEM or \ WINDOWS \ SYSTEM32 \ CONFIG \ SOFTWARE", then upon entering the Recovery Console command prompt, do following steps:

* Type: cd \ windows \ system32 \ config
* Next depends on the location of the damage:
* Type: ren software software.damage OR ren system system.damage
Next * again also depends on the location of the damage:
* Type: copy \ windows \ repair \ system
* Type: copy \ windows \ repair \ software
* After the process completes type: EXIT to exit.

7. NTLDR or NTDETECT.COM Not Found

If the computer can not boot by displaying the message "NTLDR or NTDETECT.COM Not Found", then upon entering the Recovery Console command prompt, do the following:

A. For the type of FAT partition

* Please you to boot from your Win98 floppy and copy the files NTLDR or NTDETECT.COM from the i386 directory to the drive stem (root) C: \ b.

B. For the type of NTFS partition

* Type: COPY X:\i386\NTLDR C\:
* Type: COPY X:\i386\NTDETECT.COM C:\
where X: is the address of the CD ROM drive, so adjust ..
* After the process completes type: EXIT to exit.

So how to repair Windows with the Recovery Console which I noted from various sources, some I have tried and succeeded. If these methods do not succeed then we can try to repair your Windows XP installation as a whole or forced to reformat and do fresh install of Windows XP.
Good luck


Read More …

Attrib command in Command Prompt

1 komentar

As a computer technician is required to understand the Attrib command at Command Prompt. It would be very useful to restore the folder attributes are hidden by the virus. Actually it's been a lot of tools to quickly change the attributes, eg using Antivirus SMADAV. But will lebuh good if we also understand how to change the attributes of the folder manually by Commandprompt.
Attrib command is used to display and set the attribute which is owned by a file or folder. The format of the writing of this Attrib command is:

attrib [{+ r |-r}] [{+ a |-a}] [{+ s |-s}] [{+ h |-h}] [[Drive:] [Path] FileName] [/ s [/ d]]

Description:


+r: Sets the read-only file attribute.
-r: Clears the read-only file attribute.
+a: Sets the archive file attribute.
-a: Clears the archive file attribute.
+s: Sets the system file attribute.
-s: Clears the system file attribute.
+h: Sets the hidden file attribute.
-h: Clears the hidden file attribute.
/s: Applying the Attrib command at a directory and its subdirectories.
/d: Implementing the Attrib command at a directory
/? : Displays the help of a list of commands
[Drive:] [Path] FileName: Specifies the location and name of a file or directory to be displayed or changed attributnya.

For example the use of this Attrib commands can be seen in the article "How to restore Feel that are hidden by the virus." In this example Attrib command used was:

D: \ Attrib-r-s-h / s / d

From the above explanation we can see that this command means "remove read only attributes, system and hidden from the files and directories that exist on drive D".


Read More …

How to easily create a partition in Windows 7?

21 komentar

Last night my friend asked for help to create a partition on new laptop, I also had to laugh turns 320 GB hard drive only made one partition C only. Now I will try to share how to create a partition in Windows 7
Creating Partitions in Windows on Microsoft's previous operating system such as Windows actually can also easily create partitions, but can not directly when the windows operating system is running, unless the use of certain auxiliary software. Excess in Windows 7 is able to directly create partitions on windows without the help of other software. When Windows 7 diistall for the first time usually use only one partition is drive C: as partitions. Partition is what will we divide in this tutorial. Distribution of this partition is known as shrinking the System Partition.
Note: Although this article specifically discusses the dividing partition system, the procedure described here can be used to shrink the partition ANY, not just the system partition. Also note that the partition dividing the system does not require a reboot and does not eliminate any files on shared drives.

 
Here are the steps :

1. Please you log on as Administrator.
2. Go to [Control Panel> System and Maintenance> Administrative Tools> Computer Management]. Another way is to right click on Computer icon on the desktop and select [Computer Management]. If you are prompted to enter an administrator password or confirmation, type the password or provide confirmation.

Click the arrow on the [Storage] and will open the Disk Management console.
4. Select your hard disk partitions that will be shared, such as in this example Drive C.
5. Right-click the disk you want to share and select [Shrink Volume].
6. The process will take some time, until the system shows the structure of the partition.


7. In the next window by default the system will automatically divide the size of each partition of old and new. You can change the size of the partition. Please note, once again, that this measure relates to the actual amount of free space on the partition to be shared. You can not take the space exceeds the amount of fragmentation of files on that partition. When finished, click the button [Shrink].

8. This process will be completed quite quickly, and reboot not needed. You can see the new partition size. The process is complete.
Good luck, Hopefully helpful


Read More …

“DRIVE IS NOT ACCESSIBLE and ACCESS IS DENIED”

2 komentar

Have you ever see a message like the above?
once I get into trouble after installing Windows XP Professional SP2. When Windows on Notebook Error, drive C plans would I format directly because DATA is safe - safe only (DATA is on Driver D, E as F). This is the first experience and at the same science that is very interesting that after Windows installation is complete and the driver - the driver is well equipped with other software applications, then I try to open some files that are on drives D, E and F. Which makes me surprised is the data in F in one folder that happens to the data it is important data, when I go there is a warning "DRIVE IS NOT Accessible and ACCESS IS Denied".
I was instantly confused ... dizzy and confused because this is the first time I experienced this.
After thinking for a moment, I finally decided to find a solution internet. After some time browsing I finally found the right solution for this problem,
The following steps - steps to overcome problems and Drive is not Accessible Access is Denied; namely:

1. Open Windows Explorer then click on TOOL>> FOLDER OPTION
2. Windows appear then click on VIEW, you go to the bottom then uncheck / uncheck "use simple file sharing (recommended)" then click OK
3. You right click on the folder that you can not open earlier then click Sharing And Security
4. In a new tab you select security then click ADVANCED
5. In a new tab again you choose / click the OWNER, then you select one of the username you are using (click on the username), then click / select "Replace owner and subcontainers and objects".
6. Next you APLLY and OK (Click Yes if you get a confirmation aja)
7. After that you check / check again "use simple file sharing (recommended)" then click OK
8. after that please you open the data that previously could not be opened earlier.

thus may be useful to readers who happen to encounter problems as above
Read More …

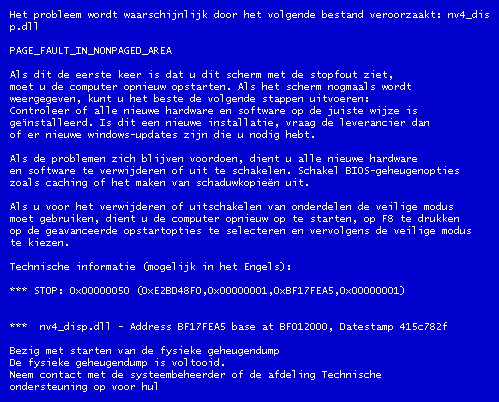
Error code on the Blue Screen Of Death (BSOD)

14 komentar

For Windows XP users may already have experienced a fatal error in Windows, Computer was suddenly dead and appears a blue screen with writing the code the code is not clear, this is called the Blue Screen Of Death or BSOD
Here I will try to explain the causes and how to solve this BSOD, especially is the intent of the codes that appear on our screens

1. IRQL_NOT_LESS_OR_EQUAL (0X0000000A)
This is a mastermind of pure culprit in the BSOD. Since most of the BSOD, this message most often appears. The error message is caused mostly because there is a mismatch drivers installed on your computer.

List of Causes:
* Problem drivers clash or do not match
* Problems Video Card, this cover is on the overclocked video card exceeds the limit or you just changed video card and you do not uninstall the old video card drivers from different chipset
* Issues Audio Card, include configuration errors or bugs in the sound card driver

2. NTFS_FILE_SYSTEM Information or FAT_FILE_SYSTEM (0X00000024) or (0X00000023)
Well, this message at least have a little "disconnected" giving a picture of where the damage was, which is on the partition or housing a filesystem, but not in HD. We can check by examining the SATA or PATA cable or can check the partition with chkdsk tool.

3. UNEXPECTED_KERNEL_MODE_TRAP (0x0000007F)
When you get a message like this, can be caused by:
* Hardware Overclock excessive
* Computer component overheating
* BIOS corrupt
* Memory and CPU is disabled

4. DATA_BUS_ERROR
This message is caused because of the possibility that memory or the memory slot on the motherboard is damaged.

5. PAGE_FAULT_IN_NONPAGED_AREA
Due to hardware damage, including main memory, video card memory, or memory in the processor (L2 Cache)

6. INACCESSIBLE_BOOT_DEVICE
Due to a mistake in the wrong hard drive jumper configuration, boot sector viruses, the wrong IDE controller drivers, or chipset driver error.

7. VIDEO_DRIVER_INIT_FAILURE
An error occurred on the installation of video card drivers are less than perfect, restart during installation or can also occur because of errors in the installation of the driver.

8. BAD_POOL_CALLER
This error can occur because of errors or incompatible drivers. Often occurs during installation of XP from an upgrade, or not from the new installation.

9. PEN_LIST_CORRUPT
This message is caused due to a damaged RAM

10. MACHINE_CHECK_EXCEPTION
Disability caused by the CPU, or an aggressively overclocked, and power supply shortages or damaged resources.

So hopefully useful and you can find the location of the damage of your computer

Read More …

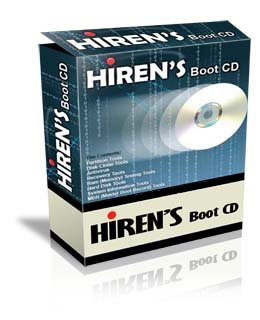
Hiren's BootCD 12.0, the most complete tool for all software problems

6 komentar

Hiren's BootCD, that's the most powerful tools to handle all computer software problems, ranging from viruses, lost data, pastition, and so forth.
some time ago I was impressed with the performance of  Hiren's BootCD 11.0, maybe it is time I came back impressed with Hiren's BootCD which has reached version 12.0 with some very nice tool
as I quoted from the official site hirenbootcd.org that explains details about Hiren BootCD 12.0 :
Hiren's BootCD (HBCD) is a completely free bootable CD that contains a load of useful tools you can make use of in a variety of situations like analyzing, recovering and fixing your computer even if the primary operating system can not be booted.


It is a great resource for anyone with computer problems who is having trouble accessing the internet to download programs in an attempt to fix it. It has a multitude of tools divided into a number of categories like partitioning tools, backup, recovery and BIOS/CMOS tools to name a few.

With some simple knowledge about what is contained on the CD, you can use it to repair many problems computer like hard drive failure, virus infections, partitioning, password recovery and data recovery.

We may call it as an emergency cd which every computer technician or home user must have.

We thank and appreciate Hiren for his great BootCD. This site is just a download place for Hiren's BootCD and is not related with Hiren. For developer's homepage please visit Hiren's Homepage under the links.


Partition Tools
If you need to make changes to the partitions on your computer, there are several applications that provides various levels of functionality for accomplishing this goal. You can both create and delete partitions from your computer, even while there are other partitions on the hard drive you are modifying. You can also resize partitions if needed, to change how much space is allocated to them.


Backup and Recovery
There are several backup and recovery tools on Hiren's BootCD. Backup tools like GetDataBack, HDD Scan, Partition Find and Mount, PhotoRec, Recuva, Undelete... let you copy data off of your hard drive and schedule automatic backups to ensure your data is saved to another location. You can also recover deleted data, whether that data was deleted intentionally or accidentally. There are also a few tools that will help you recover data from damaged or corrupted portions of your hard drive if you are unable to recover them through other methods.


Testing Tools
Hiren's BootCD provides a variety of tools for testing different aspects of your computer. If you suspect that your RAM is corrupted or that a piece of hardware on your machine is not functioning properly, there are several applications you can run to determine the problems. You can also perform hard drive tests to see whether your hard drive is physically damaged, and get a report on how much longer your hard drive is expected to work.


Password Tools

Password recovery and modification tools are also provided on Hiren's BootCD. You can change the administrator password on Windows machines, and there are utilities for saving passwords for your online accounts in an encrypted format. You can also encrypt your entire hard drive with Hiren's BootCD so that a password is required to read or write any data from or to your hard drive.


Mini Windows XP

To clear a virus and use a large collection of HBCD tools, choose the Mini Windows XP option. A simple version of Windows XP will load on the computer. It might take a few minutes to load everything because it processes files directly from the CD. Once it has loaded, wait for the Hiren's Boot disk menu to pop up. Select the "Menu" option and scroll through the programs. The disk features Windows password hackers, registry cleaners and a large collection of antivirus software.

See the latest version of Hiren's BootCD Here
Download Hiren BootCD 12.0
Read More …

How to lock a flashdisk?

2 komentar

The flurry of work has forced me to postpone a few posts that should have been realized in the last month.
Many of the things I wanted to write but because of time constraints so that I finish this post.
following I will try to explain about how to lock the flash with a notepad.
Sometimes we use computers in the office and at home many contain data that is highly personal, but it's not good to forbid other people borrow it. For that file needs to be made a separate folder and then we lock with a password, so that others can not membukanya.Nah Instead of hard to find software for locking folder containing personal data, make themselves better, how easy .


1 - Create a new folder (the folder name like - like it)

2 - Create new text file in that folder and type the code below in notepad
Code:

CLS

@ ECHO OFF

Folder title
Budi_FlashLock

if EXIST "Control Panel. {21EC2020-3AEA-1069-A2DD-08002B30309D}" goto UNLOCK

if NOT EXIST
Budi_FlashLock goto MDLOCKER

: CONFIRMED

echo Welcome to
Budi_FlashLock

echo http://www.katabudi.blogspot.com

echo budi@bdctech.tk

echo ====================================

echo.

echo.

Are you sure you echo Want To lock the folder (Y / N)

set / p "cho =>"

if% cho% == Y goto LOCK

if% cho% == y goto LOCK

if% cho% == n goto END

if% cho% == N goto END

echo Invalid choice.

goto CONFIRM

: LOCK

Budi S FlashLock ren "Control Panel. {21EC2020-3AEA-1069-A2DD-08002B30309D}"

attrib + h + s + r + a "Control Panel. {21EC2020-3AEA-1069-A2DD-08002B30309D}"

echo Folder locked

goto End

: UNLOCK

echo Welcome to
Budi_FlashLock

echo http://www.katabudi.blogspot.com

echo budi@bdctech.tk

echo ====================================

echo.

echo.

echo Enter password to unlock folder

set / p "pass =>"

if NOT% pass% == type your password here go to FAIL

attrib-h-s-r-a "Control Panel. {21EC2020-3AEA-1069-A2DD-08002B30309D}"

ren "Control Panel. {21EC2020-3AEA-1069-A2DD-08002B30309D}"
Budi_FlashLock

echo Folder Unlocked successfully

goto End

: FAIL

echo Invalid password

goto end

: MDLOCKER

md
Budi_FlashLock

echo
Budi_FlashLock created successfully

goto End

: End

3 - After you copy the code above, see on line (35), you will find "type
  password here "<- (change the word" type in your password here "with the password you want). 4 - After that, save the file with the name "locker.bat". 5 - Now back to the folder and you will see the Command (LOCKER). 6 - Click on Comand and will appear a new folder with the name "Private". 7 - Well .. now lives on a mission hiding private files in a way to move your personal files into the folder "private" before, after making sure all files are not any left over, return to the Comand "LOCKER" earlier and click Comand, he will ask "if you want to lock folders you? "Y / N? 8 - Type "Y", finally locked too 9 - If you want to open a private folder before, just click Command LOCKER and input a password that you created earlier
Read More …

What and how do I use Hiren's Boot CD 11.0?

91 komentar


According to the previous post I promise that I will discuss the Hiren Boot CD 11.0, a package tool that must be owned by a computer technician, I've just used it to eradicate the virus sality which have damaged Windows, to not be able to boot again.
The following is an excerpt from http://www.hirensbootcd.net/ explanation:

Hiren's BootCD (HBCD) is a completely free bootable CD That contains a load of useful tools, you make use of cans in a variety of situations like analyzing, recovering and fixing your computer even if the primary operating system, cans not be booted.

It is a great resource for anyone with computer problems Who is having trouble accessing the internet to download programs in an attempt to fix it. It has a multitude of tools divided into a number of categories like partitioning tools, backup, recovery and BIOS / CMOS tools to Name A Few.

With Some simple knowledge about what is contained on the CD, you cans use it to repair many computer problems like hard drive failure, virus infections, partitioning, password recovery and data recovery.


May We call it as an emergency cd Technician or the which every user's home computer must have.

We thank and appreciate for his great Hiren BootCD. This site is just a download place for Hiren's BootCD and is not related with Hiren. For developer's homepage please visit Hiren's homepage under the links.


Partition Tools
If you need to make changes to the partitions on your computer, there are applications installments That Provides Various levels of functionality for accomplishing this goal. You can both create and delete partitions from your computer, even while there are other partitions on the hard drive you are modifying. Also You can resize partitions if needed, to change how much space is Allocated to them.


Backup and Recovery
There are installments backup and recovery tools on Hiren's BootCD. Backup tools like GetDataBack, HDD Scan, Partition Find and Mount, PhotoRec, Recuva, Undelete ... let you copy data off of your hard drive and schedule automatic backups to Ensure your data is saved to another location. Also You can recover deleted data, whether That data was deleted intentionally or accidentally. There Are Also A Few tools that will of help you recover data from Damaged or corrupted portions of your hard drive if you are Unable to recover Them through other methods.


Testing Tools

Hiren's BootCD Provides a variety of tools for testing different aspects of your computer. That if you suspect your RAM is corrupted or That a piece of hardware on your machine is not functioning properly, there are installments cans applications you run to determine the problems. Also You can perform a hard drive tests to see whether your hard drive is physically Damaged, and get a report on how much longer your hard drive is expected to work.

Password Tools
Password recovery and modification tools are Also provided on Hiren's BootCD. You can change the administrator password on Windows machines, and there are utilities for saving passwords for your online accounts in an encrypted format. Also You can encrypt your entire hard drive with Hiren's BootCD so That a password is required to read or write any data from or to your hard drive.


Mini Windows XP
To clear a virus and use a large collection of HBCD tools, choose the Mini Windows XP option. A simple version of Windows XP will of load on the computer. It Might take A Few minutes to load everything Because it processes files directly from the CD. Once it has loaded, wait for the Hiren's Boot disk menu to pop up. Select the "Menu" option and scroll through the programs. The disc features the Windows password hackers, registry cleaners and a large collection of antivirus software.

Hiren Boot CD 11.0 it contains almost all the major equipment that we need to repair the damage the software on our computers.

See the latest version of Hiren's BootCD Here

Download Hiren's Boot CD 11.0 here
Read More …

How to download videos from Youtube?

16 komentar

How to download videos from Youtube? that's a lot of questions asked by a friend of mine.
from where I was inspired to write this article may be useful to readers of this blog.
actually a lot of software that can be used. but this time I use IDM or Internet Download Manager.
Why did I choose this software, the answer is other than can be used to download Flash video (streaming) can also increase your download speed up to 40-fold with minimal settings.
but that's not what I will discuss here. okay back to the main story.
How to download videos from Youtube? that's a lot of questions asked by a friend of mine.


How to download videos from Youtube? that's a lot of questions asked by a friend of mine.
from where I was inspired to write this article may be useful to readers of this blog.


actually a lot of software that can be used. but this time I use IDM or Internet Download Manager.
Why did I choose this software, the answer is other than can be used to download Flash video (streaming) can also increase your download speed up to 40-fold with minimal settings.
but that's not what I will discuss here. okay back to the main story.
How to download videos from Youtube? that's a lot of questions asked by a friend of mine.
from where I was inspired to write this article may be useful to readers of this blog.
actually a lot of software that can be used. but this time I use IDM or Internet Download Manager.
Why did I choose this software, the answer is other than can be used to download Flash video (streaming) can also increase your download speed up to 40-fold with minimal settings.
but that's not what I will discuss here. okay back to the main story.
First prepare IDM, cHow to download videos from Youtube? that's a lot of questions asked by a friend of mine.
from where I was inspired to write this article may be useful to readers of this blog.
actually a lot of software that can be used. but this time I use IDM or Internet Download Manager.
Why did I choose this software, the answer is other than can be used to download Flash video (streaming) can also increase your download speed up to 40-fold with minimal settings.
but that's not what I will discuss here. okay back to the main story.
First prepare IDM, can be downloaded at www.internetdownloadmanager.com or search on google.
After that Install IDM as usual. after they finish and then restart the computer.
we begin to make simple settings IDM can download Flash Video.
1. IDM Open, then locate the Download tab> Options
Make a setting just like in the image below and then OK


then restart firefox.
good luck


Read More …

How do I install windows with a USB flash?

1 komentar

This morning around 5 am when I was falling asleep suddenly there was an SMS from a friend who asked how to install Windows from USB.It makes me inspired to write on this blog

Installing windows xp from flash disk is also very useful to install windows xp in a few notebooks that are not equipped with serial cd-rom as a kind of mini notebook Asus Eee pc. It can be installed using an external cd-rom, but for more savings we can try to install windows using only flash disk


With technological development flash disk now that have greater capacity then we can easily use a flash disk to install windows, the following should be prepared syarat2.

1. Flash disk (if you can at least 1GB).

2. victim's computer (victim)

3. master computer, complete with cd-rom of course (to create a master flash disk)

3. windows xp cd (original or fake is up)

4. program for module installation

- USB_PREP8 (download via indowebster)


- PEtoUSB (download via indowebster)

after never knacks above is ready then the next step to start installing windows xp from flash disk:

the steps are as follows:


1. Plug the flash disk to your computer and note the position of the master drive, whether on the F:, G:, H:, O: and so forth

2. file2 the above extract, USB_PREP8 and PEtoUSB into a folder eg C: / usb (extract the files USB_PREP8 be a folder, copy all the files and move them to the folder C: / usb) files as well PEtoUSB.


3. Prepare instalan cd windows xp cd rom and put it into a master computer.

4. then open the folder C: \ USB that has been created and contains the files mentioned above.

5. Next run the file named "usb_prep8.bat" and will display a command prompt window contains a variety of command

press any key on the keyboard.

6. next on your computer screen will appear PEtoUSB program that asks you to format the flash disk, click Start

7. If the formatting process is complete, close the program PEtoUSB (do not close the windows command prompt usb_prep8.bat) on the screen will display the options of 0 to 5.

8. Then select the option to 1 to select the Windows installation source files (select the cd rom drive that contains your Windows installation cd) or can also file2 source folder containing the installation of windows.

9. after the above, will be asked to again choose the options and select option number 3 to mentukan where you plug the flash disk you, when in drive E then type e and press enter.

10. after this stage select option 4 to start the installation process modules that will be copied to flash disk automatically. Answer any confirmation that comes with Y, or YES or OK or other forms of approval. in this process will take quite a long time, the process of making the module installation file to your flash disk (probably more than 15 minutes)
aja patient, after you've finished now has a flash disk that is bootable and able to install windows directly.

11. unplug the flash disk from the master computer and then plug it into your computer to start the installation, do you boot your computer from the flash disk.

then the screen will show two installation options, choose the second option and the windows installation process will start running.
Thus my explanation may be useful, happy trying new things.


Read More …

How to speed up computer performance with a defrag?

2 komentar

Often we see slow computer problems, it could be caused by several things, one of the messy file.
to overcome this one is to defrag.
Formatting the hard disk is a temporary solution. Plus the way it requires us to do various other things such as backing up data, reinstalling all the programs, setting up the windows, and restore the data. Even after this, if you do not spend time for maintenance, hard disk, the problem will come back again a few months after formatting the hard disk.

Cleaning and Men-Hard Disk Defrag

Defrag (defragmentation / unify piece): cause the only one who makes the hard diskmu slow is the high separation of data files and the number of groupings. In short, the way hard drives work is that when you install a program, then the windows to place the data on your hard drive in the segment nearest the existing data, if the segment is full, then the data will be stored in the next segment. Windows puts a kind of marker from one segment to another segment to process a file, and this process will continue until the windows reach the EOF (End Of File).
It is highly recommended to do defrag your hard disk so that the segments of data that can be moved separately its position so close, if not possible to be combined.

Windows does provide a feature to defrag the hard drive, but the process requires resources / sources that are substantially during the defrag your hard disk. My advice, do not use that feature. Besides that, I suggest you to download Smart Defrag (1.66 MB) for free.

This program is rich in features, including automatic defrag. By default, automatic defrag in the ON condition - he did defragment if the system in a state of unemployed for five minutes, but you can change according to your wishes. When finished setting up the Smart Defrag, you can forget to defrag your hard drive, because he walked with windows and works invisible to monitor and defrag your hard drive.

Tip: When talking about defragment the hard drive, I recommend another program in addition to dealing with Smart Defrag Pagefile. Pagefile fragmentation can cause a long boot process. Page Defrag (68 KB) defragmented the pagefile when booting so that the segments remain adjacent pagefile.

Clean your computer

Another factor that can cause a slow hard drive performance is, temporary files (temporary files), the legacy after the uninstall, cookies, logs, and many of the files that are not useful to take place in harddiskmu - which culminate in the fragmentation of files. It is important for you to delete those files. Windows already provides a feature (very limited) for it. You can try the Disk Clean-up Wizard in Accessories submenu in All Programs.

To clean up completely, I recommend Comodo System Cleaner (CSC), which can dodownload free. This program can be defragmented the registry, could accelerate the opening of a program by deleting all files and settings that are not needed privacy. CSC also has a feature to clean up our computers on schedule (scheduled cleaning).

In conclusion, the cleaning of the computer system is scheduled by CSC and auto-defrag from Smart Defrag will improve performance and speed of hard diskmu, so you seemed to have a new hard disk. With these programs you will not feel your hard disk to work slowly.
so hopefully useful. good luck
Read More …

How to Convert Youtube Videos

7 komentar

If you have favorite videos on the web, you can use download software to convert YouTube videos into different formats such as MP4, FLV, 3GP, AVI, DivX and WMV. Depending on the type of download YouTube software you use, you can save the videos on your computer or view them right from your iPod or mobile phones.

MPEG-4, commonly known as MP4, is a format file created to provide DVD quality of audio and video in a very small file size. It is ideal for playing on portable MP4 players like the iPod Video and mobile phones that are equipped with a technology to playback MP4 files.

There are sites on the web that allow you to download YouTube videos and save them in MP4 format. These sites do not require a converter as they use compressed domain transcoder technology to converts FLV to MPEG quickly and with less losses.

On the other hand, you can download a converter software to convert videos from YouTube into different formats like the MP4. Some converters can convert YouTube videos into several formats while a few can convert into one or two file formats.

FLV stands for Flash Live Video and it is the type of video file used by YouTube, Reuters and Google videos. Some converters retain the FLV extension file of the video instead of converting into another format. There are video and audio players that can play FLV files.


The 3GP is a multimedia file created by the Third Generation Partnership Project of 3GPPP used on 3G mobile phones. It can also be used by 2G and 4G mobile phones. With this technology, it is possible to play and view videos from mobile phones and Pods.

The file extension .3GP is a simplified standard of the MP4 designed to reduce the amount of storage required and decrease the bandwidth requirements established to accommodate for mobile phones.

If you have favorite videos on the web, you can use download software to convert YouTube videos into different formats such as MP4, FLV, 3GP, AVI, DivX and WMV. Depending on the type of download YouTube software you use, you can save the videos on your computer or view them right from your iPod or mobile phones.

MPEG-4, commonly known as MP4, is a format file created to provide DVD quality of audio and video in a very small file size. It is ideal for playing on portable MP4 players like the iPod Video and mobile phones that are equipped with a technology to playback MP4 files.

There are sites on the web that allow you to download YouTube videos and save them in MP4 format. These sites do not require a converter as they use compressed domain transcoder technology to converts FLV to MPEG quickly and with less losses.

On the other hand, you can download a converter software to convert videos from YouTube into different formats like the MP4. Some converters can convert YouTube videos into several formats while a few can convert into one or two file formats.

FLV stands for Flash Live Video and it is the type of video file used by YouTube, Reuters and Google videos. Some converters retain the FLV extension file of the video instead of converting into another format. There are video and audio players that can play FLV files.

The 3GP is a multimedia file created by the Third Generation Partnership Project of 3GPPP used on 3G mobile phones. It can also be used by 2G and 4G mobile phones. With this technology, it is possible to play and view videos from mobile phones and Pods.

The file extension .3GP is a simplified standard of the MP4 designed to reduce the amount of storage required and decrease the bandwidth requirements established to accommodate for mobile phones.


Read More …

How to create Windows XP live CD

0 komentar

To create a Windows XP Live CD we will require

1. Bart PEbuilder
2. A CD burner like Nero
3. A bootable Windows XP CD and
4. Some pebuilder plugins to customize the CD.

Step 1: Download PeBuilder from here and install it. Make sure you have enough free space on the drive where you install the program. After you have finished adding all programs it will create an ISO to be burned into a disk. The size of the ISO will depend upon how many programs you add to your live CD. I would recommend atleast 700MB of free space.

Step 2: You may want to set a wallpaper that will appear on the desktop when you boot the CD. For this open the folder where you have installed PEbuilder and replace the file bartpe.bmp with the wallpaper of your choice.

Step 3: Download XPE plugin from here (direct download link). It's the GUI shell of the XP Live CD that will create the XP start button and taskbar. You are free to download as many plugin (applications) you want. Currently there are more than 500 applications to choose from. Both freewares and commercial applications are available. Antivirus programs like Kaspersky, NOD32, Avast; burning program Nero; media players like VLC; OpenOffice, Foxit PDF reader, Acrobat Reader etc are available.


Step 4: After you have finished downloading all your favourite programs, open PEbuider and specify the source path to the Windows XP installation bootable CD. You can copy the CD to your hard disk and point the source to the copied file.


Step 5: Click Plugins and add all the plugins you have downloaded. Since we have added XPE, disable nu2shell and the startup group from the list of plugins.

Step 6: Specify the ISO image file and click Build. The program will integrate the plugins and create an ISO image.

Step7: Burn the image into a disk using any burning software and your live CD is ready.


The Live CD Desktop


Running Abiword


Running VLC Media Player
Read More …